Sometimes making a cake means making sacrifices. For example, glorifying a team as awful as the Melbourne Storm! (Go Dragons!). But they are out of the competition now anyway, so it’s a little less painful to talk about.
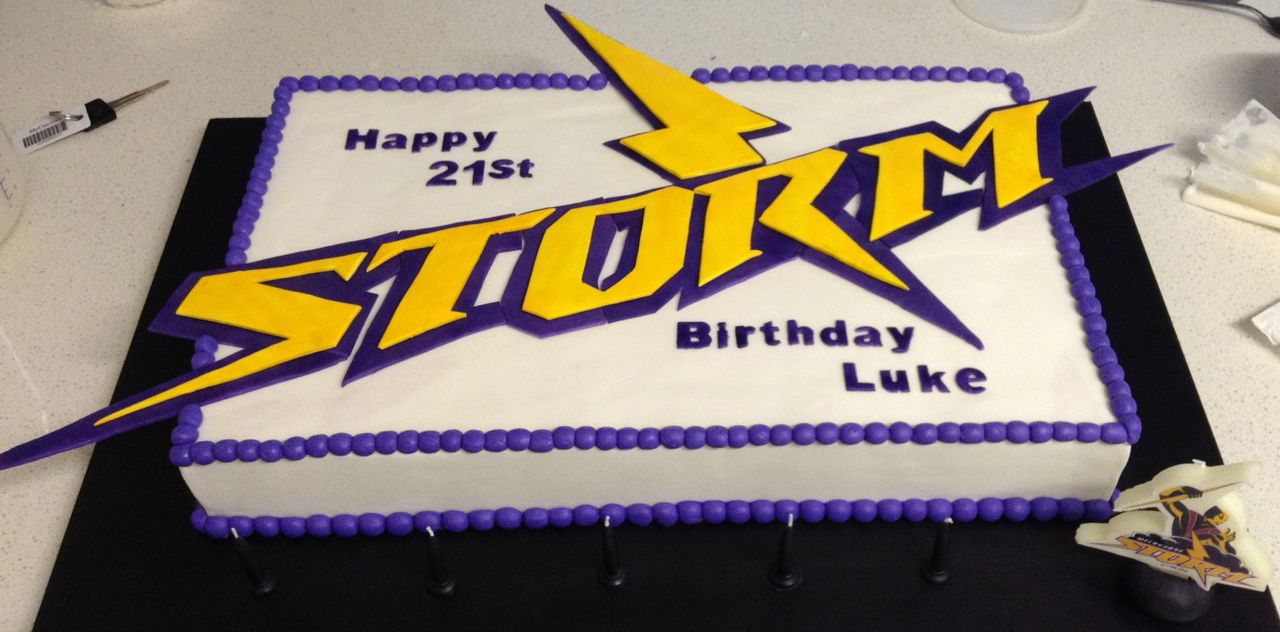
Gross, a Melbourne Storm Cake!
Just joking! This cake was really fun to make, and especially so because it was a joint effort with one of my most lovely friends, Nat! Nat’s brother was turning 21, and she wanted to make a Storm cake. Asking me for a help with a cake is a disaster waiting to happen (the best kind, I promise!) and one idea led to another and next minute we were planning a slab-sized cake for 80 people, covered with fondant icing.

Making the Cake
The slab was buttercake, baked by Nat from scratch. I then ganached them all together (well, I did until I ran out of ganache halfway through, then I made a speedy trip to the supermarket to stock up on chocolate. This cake was definitely much bigger than I had estimated!).
I still only JUST had enough ganache and as such, the edges, corners and top weren’t as smooth as I would have liked but the cake was rather forgiving since the huge logo was to be placed across the top.
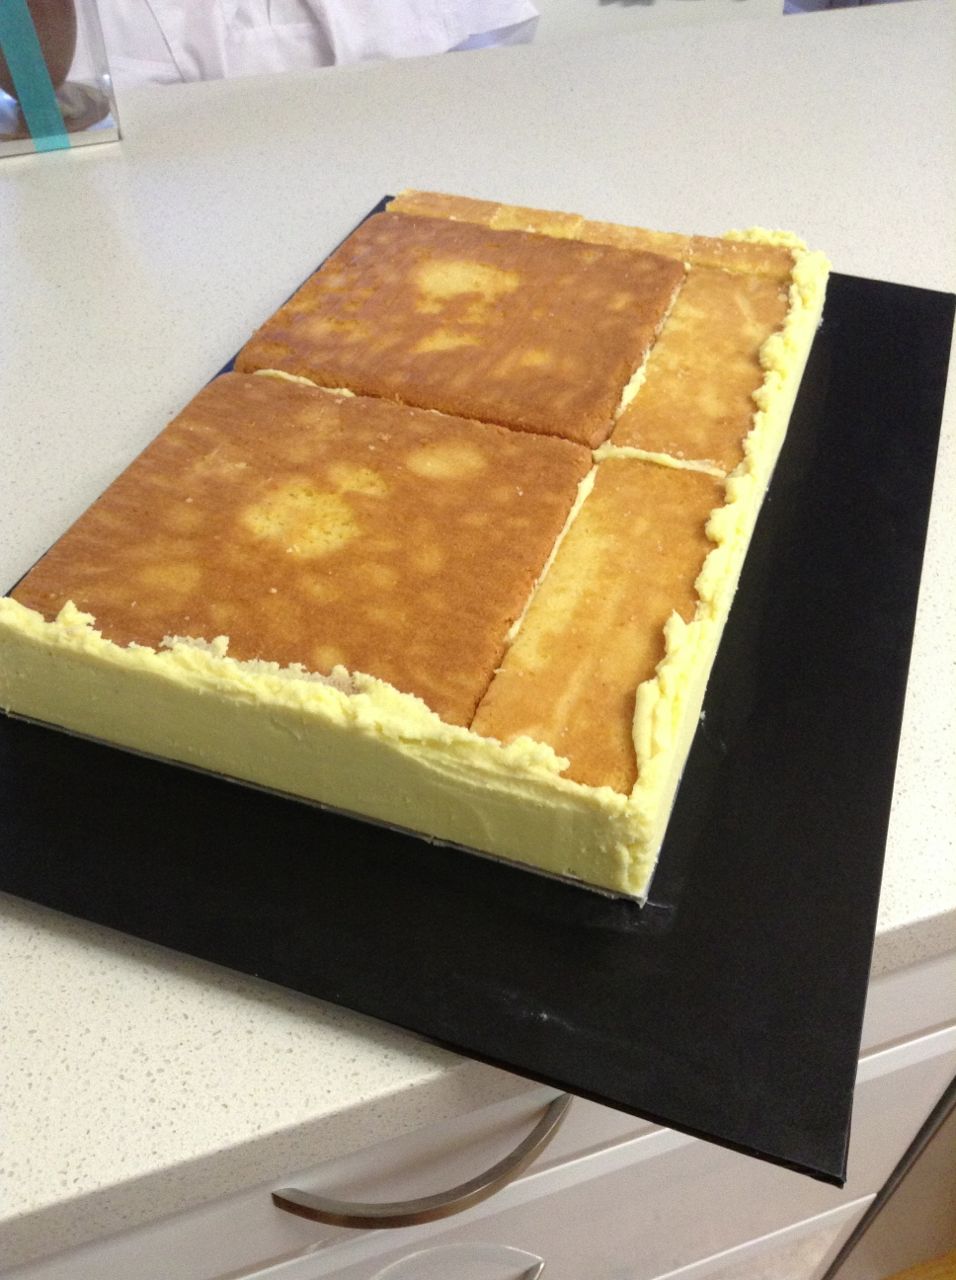
So this was when I ran out of ganache. Not cool at all.

Covering with Fondant
This was the biggest cake I have ever covered in terms of surface area, and although I tried and tried and tried, I could not get a piece of fondant big enough to cover it in one go. I ended up doing it in two halves, and the join down the middle was (mostly) covered by the logo on top. I still haven’t mastered the art of concealing joins, so that was a little frustrating. On the to-do list (or perhaps just don’t ever make a cake this big again!).
Making the Logo
I spent a long time trying to work out how we would make the logo. We wanted it to be perfect, and look exactly like it does on the Storm’s logo. This was tricky, because we also needed it to be REALLY BIG!
The internet was not very helpful, as I couldn’t find any cakes replicating the idea we were going for. So, I decided to experiment. I printed the logo off, really big! Then I stuck it onto a thick cardboard, and cut around the outline. I then cut the thick cardboard with the logo on top into segments (like a puzzle!). I did this for both the purple (biggest) outline, and the yellow (smaller) outline.

Printed logo!
I rolled gum paste out (IMPORTANT: proper gum paste! Not fondant, and NOT fondant mixed with tylose! You need this to dry ROCK hard due to the pointy fragile parts), put the cardboard shaped on top, and cut around the edges with a pen knife.
As the gum paste started to dry, I fitted the pieces together like a puzzle and shaved the corners and joining sections so that it al fitted together comfortably.

When the gum paste pieces had dried rock hard overnight, I then used my airbrush system to paint them purple and yellow respectively. You could also paint them with vodka mixed with food colouring and a brush by hand, but the airbrushing is much faster if you have access to one. You could also pre-colour the gum paste before cutting out, but we wanted really bright colours which would have required way too much colouring, as well as potentially soften the gum paste and prevent it from drying stiff.

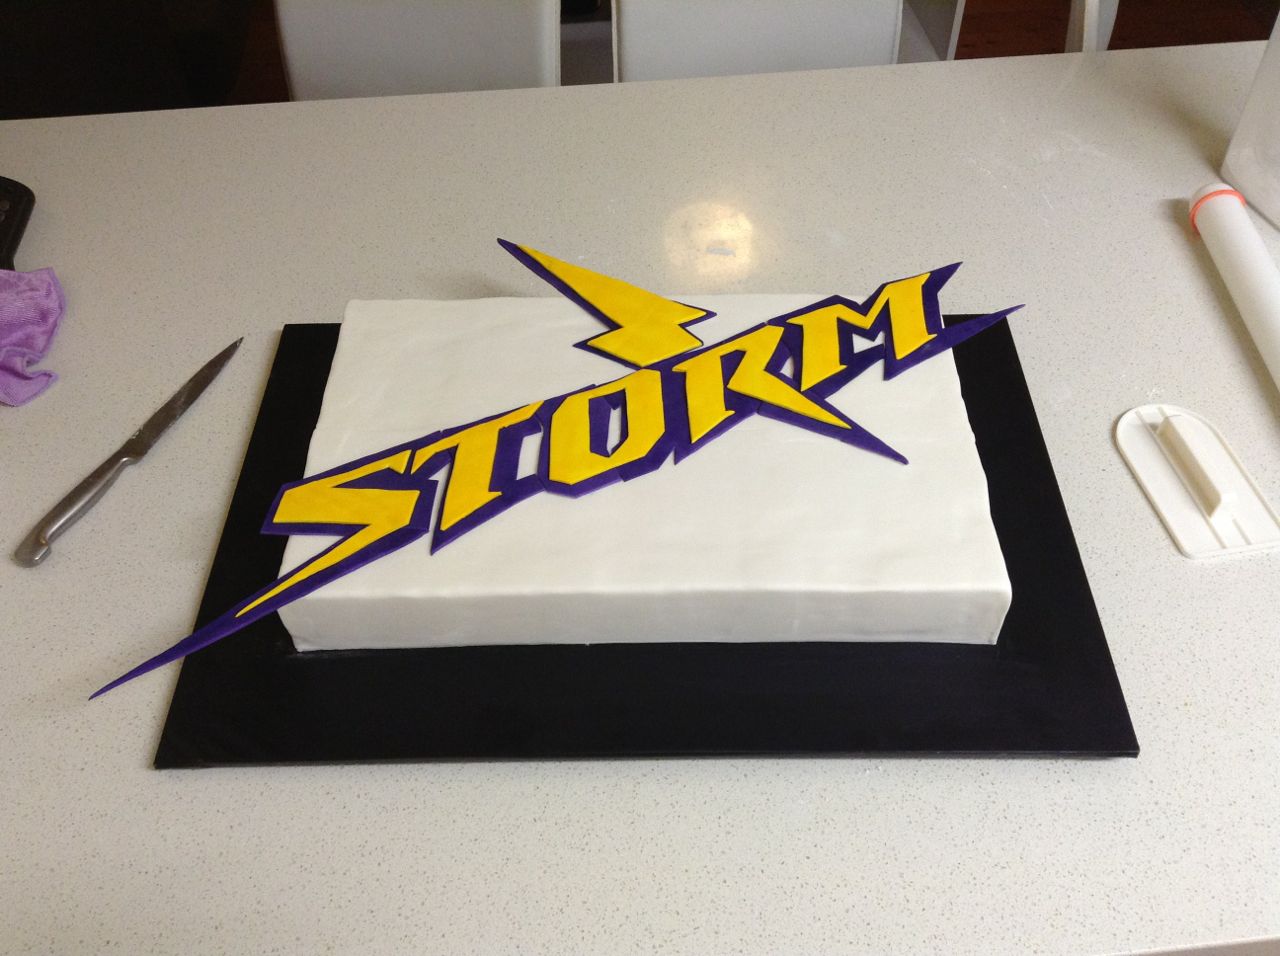
I was really pleased with the end result. I probably would have cut it in less pieces if I did it again (i.e. make the segments bigger) but it was definitely easier to work with the way I did it. From a distance, the effect is still the same. I thought it looked pretty neat – you could certainly tell what it was mean to be!
Oh, and it weighed 7.5kg. That, my friend, is a lot of cake!
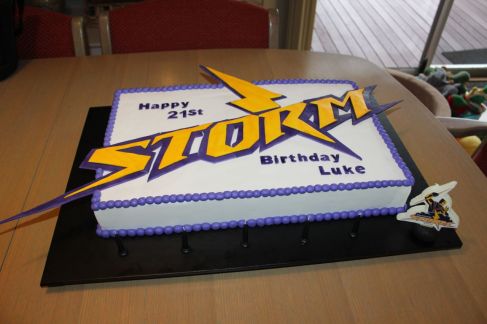
Thanks to the lovely Nat for letting my hijack her cake plans and for being a handy help in the kitchen. I could definitely get used to working with a right-hand (wo)man!
